Contents
Introduction:
Maintaining the optimal performance of your refrigerator is crucial for various reasons, ranging from energy efficiency to the preservation of food safety. One often-overlooked yet vital aspect of refrigerator maintenance is the regular cleaning of its coils. Fridge coils, including both condenser and evaporator coils, play a pivotal role in the refrigeration process, facilitating heat exchange to keep your perishables fresh.
Understanding the intricate mechanisms and intricacies of fridge coils is essential for every conscientious homeowner. In this comprehensive guide, we delve into the importance of cleaning fridge coils, exploring the multifaceted benefits that extend beyond mere cleanliness. From enhancing energy efficiency and prolonging the lifespan of your appliance to ensuring the safety of stored food items, this exploration aims to empower you with the knowledge needed to safeguard your refrigerator investment.
Fridge coils come in various types and are positioned differently in different refrigerator models, such as top freezer, bottom freezer, side-by-side, and French door refrigerators. This diversity necessitates a nuanced understanding of where these coils are located and how their unique characteristics influence cleaning procedures. Recognizing the signs indicating the need for coil maintenance, such as overheating, increased energy consumption, and inefficient cooling, is crucial for proactive upkeep.
Arming yourself with the right tools and materials is the first step toward efficient coil cleaning. A simple toolkit, including a screwdriver, coil brush, vacuum cleaner with a brush attachment, compressed air can, and a damp cloth, is all you need to embark on this maintenance journey. But before you start, proper preparation is key. Unplugging the refrigerator, emptying its contents, and removing access panels or grilles are integral steps to ensure a thorough cleaning process.
In the subsequent sections of this guide, we’ll walk you through the step-by-step process of cleaning both condenser and evaporator coils. Techniques such as brushing off loose debris, vacuuming, and wiping down with a damp cloth will be detailed, providing you with a comprehensive understanding of how to tackle each stage of the cleaning process effectively.
As we conclude this introduction, keep in mind that proper maintenance extends beyond cleaning. We’ll share maintenance tips that go beyond coil care, including regular cleaning schedules, keeping the surrounding area clean, and checking seals and gaskets. Moreover, we’ll touch upon the importance of professional maintenance services to ensure the longevity and sustained efficiency of your refrigerator.
So, buckle up, as we embark on a journey through the intricacies of refrigerator coil cleaning, empowering you with the knowledge and skills to keep your fridge running smoothly for years to come.
Understanding Fridge Coils:
To comprehend the nuances of refrigerator coil cleaning, it’s imperative to gain insight into the diverse types of coils and their specific functions within various refrigerator models. There are primarily two types of coils—condenser coils and evaporator coils—each contributing uniquely to the refrigeration cycle.
Condenser coils, usually located at the back or beneath the refrigerator, are responsible for releasing the heat absorbed from the interior of the fridge. As the refrigerant passes through these coils, it undergoes a phase change, releasing heat and allowing the refrigerant to continue its cycle. Understanding the role of condenser coils is fundamental, as these components directly impact the overall efficiency of the refrigeration system.
In contrast, evaporator coils are typically found inside the refrigerator’s compartments, absorbing heat from the contents to keep them cool. These coils play a pivotal role in maintaining the desired temperature within the fridge. While condenser coils expel heat, evaporator coils absorb it, creating a continuous cycle that ensures effective refrigeration.

Moreover, the location of these coils varies across different refrigerator models. In top freezer refrigerators, for instance, the coils are usually located at the back of the appliance. Bottom freezer refrigerators often feature coils beneath the unit, while side-by-side and French door refrigerators may have them situated at the back or underneath.
Understanding the intricacies of coil placement is essential for efficient cleaning, as accessibility varies based on the refrigerator’s design. This section will delve into the specifics of each model, providing a comprehensive guide to locating and cleaning condenser and evaporator coils according to your refrigerator type.
Signs Your Fridge Coils Need Cleaning:
Your refrigerator, a silent workhorse in the kitchen, operates optimally when its coils are clean and free from debris. Recognizing the signs that indicate your fridge coils need attention is crucial for preventing potential issues and ensuring the longevity of your appliance. The following are key indicators that it’s time to roll up your sleeves and embark on a cleaning mission:

Overheating of the Fridge:
When the coils are covered in dust and grime, the heat exchange process becomes inefficient. Overheating of the fridge is a clear sign that the coils are struggling to dissipate heat properly, impacting the overall performance of the appliance.
Increased Energy Consumption:
Dirty coils force the refrigerator to work harder to maintain the desired temperature. This increased workload translates into higher energy consumption, reflected in your electricity bill. Monitoring your fridge’s energy usage can serve as an early warning sign that the coils may be in need of a thorough cleaning.
Inefficient Cooling:
If you notice that your refrigerator is not cooling as effectively as it used to, the culprit may well be dirty coils. Inadequate heat exchange can compromise the cooling efficiency, leading to fluctuating temperatures within the fridge compartments.
Accumulation of Dust and Debris:
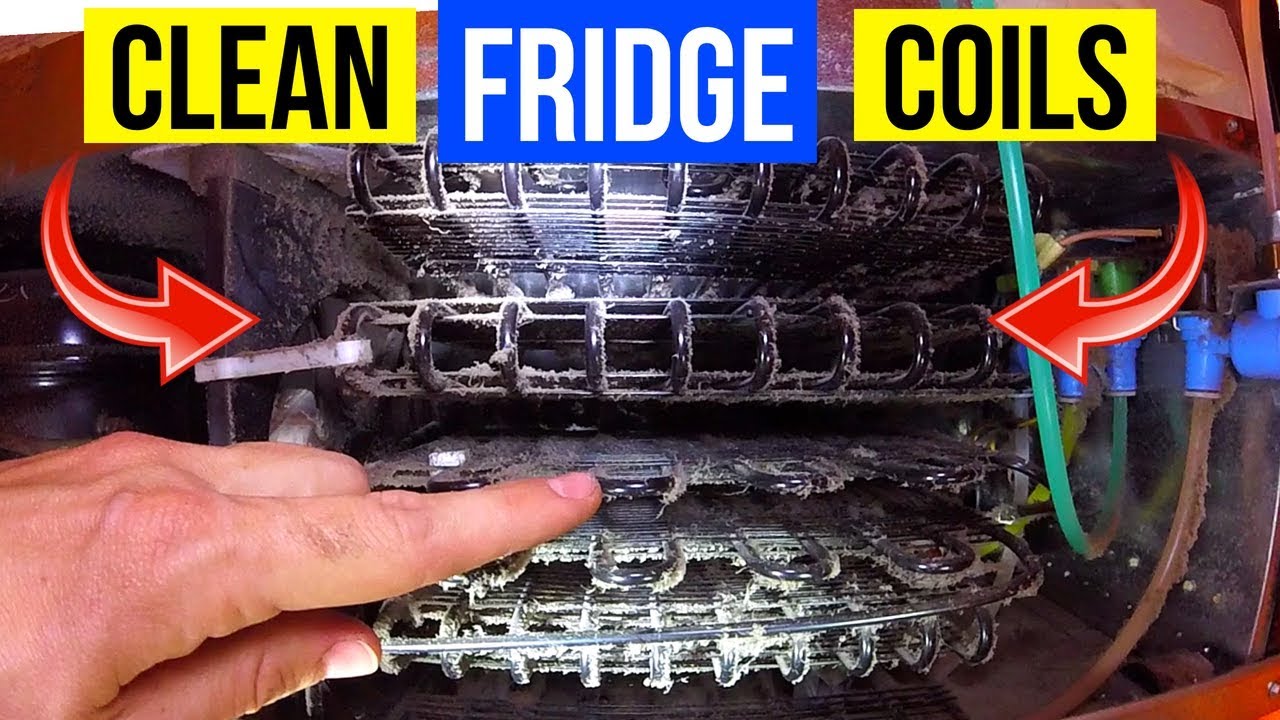
A visual inspection at the back or beneath the refrigerator often reveals a buildup of dust and debris on the coils. This accumulation not only inhibits heat dissipation but also provides a breeding ground for bacteria and mold. Regular checks for visible dirt and debris are essential for maintaining a hygienic and efficient appliance.
Tools and Materials Required:
Equipping yourself with the right tools and materials is a crucial step in ensuring a thorough and effective cleaning process for your refrigerator coils. Here’s a detailed list of items you’ll need to gather before you embark on this maintenance task:

Screwdriver:
A screwdriver is essential for removing any panels, grilles, or covers that may be obstructing access to the coils. Choose the appropriate type and size based on your refrigerator’s design.
Coil Brush:
A coil brush with soft bristles is ideal for dislodging and removing stubborn dust and debris from the coils. The brush should be designed to reach into tight spaces and effectively clean without causing damage.
Vacuum Cleaner with Brush Attachment:
A vacuum cleaner equipped with a brush attachment is invaluable for sucking up loosened dirt and preventing it from spreading. The brush attachment helps dislodge and capture debris from the coils.
Compressed Air Can:
For hard-to-reach areas and intricate coil designs, a compressed air canister proves useful. It allows you to blow away dust and debris that may be lodged in crevices or corners not easily accessible with a brush or vacuum.
Damp Cloth:
A damp cloth is handy for wiping down the coils after brushing and vacuuming. This final step helps ensure that any remaining residue is removed, leaving the coils clean and ready for optimal heat exchange.
Before you start the cleaning process, it’s crucial to unplug the refrigerator to ensure safety. Additionally, emptying the contents of the fridge and removing any access panels or grilles will grant you unobstructed access to the coils.
Preparing for Cleaning:
Before diving into the intricate process of cleaning your refrigerator coils, it’s crucial to undertake a series of preparatory steps. These measures ensure a safe, efficient, and thorough cleaning process. Follow these guidelines to set the stage for a successful coil maintenance session:
Unplug the Refrigerator:
Start by disconnecting the refrigerator from the power source. This precautionary measure is essential for your safety and allows you to work on the coils without the risk of electrical shocks.

Emptying the Fridge:
Remove all perishable items from the refrigerator. This step not only lightens the load when moving the appliance but also prevents any potential spills or accidents during the cleaning process.
Removing the Access Panel or Grille:
Depending on your refrigerator model, access to the coils may be hindered by an access panel or grille. Use the appropriate tools, such as a screwdriver, to remove these covers and expose the coils. This step varies based on the design of your refrigerator, so consult your appliance’s manual for specific instructions.
Taking these preparatory steps ensures that you can access the coils without any hindrances and minimizes the risk of accidents. The unplugging of the refrigerator is particularly crucial, as it guarantees your safety while working on the appliance’s internal components.
With the refrigerator unplugged, emptied, and access panels or grilles removed, you’re now ready to embark on the next stages of the cleaning process. The subsequent sections will guide you through the specifics of cleaning both condenser and evaporator coils, offering step-by-step instructions for a comprehensive maintenance routine.
Cleaning Condenser Coils:
Cleaning the condenser coils is a fundamental aspect of refrigerator maintenance, directly impacting the appliance’s efficiency and performance. Follow these steps to ensure a thorough cleaning of your condenser coils:
Brushing Off Loose Debris:
Utilize a coil brush with soft bristles to gently remove any loose dust and debris from the condenser coils. Begin at the top and work your way down, ensuring that you cover the entire surface area. Pay special attention to corners and crevices where debris may accumulate.
Compressed Air for Tight Spaces:
In areas where the brush may not reach, use a compressed air canister to blow away dust and debris from tight spaces. This ensures a comprehensive cleaning, especially in intricate coil designs.
Vacuuming the Coils:
Employ a vacuum cleaner with a brush attachment to suction away the dislodged dirt. Move the vacuum nozzle across the coils, reaching into gaps and corners. This step helps prevent the spread of debris and ensures a cleaner working environment.
Wiping Down with a Damp Cloth:
Dampen a cloth with water and gently wipe down the condenser coils. This final step removes any remaining residue and ensures that the coils are free from dust, allowing for optimal heat exchange.
It’s important to note that the frequency of condenser coil cleaning depends on factors such as the environment, pet hair accumulation, and overall usage. Regular cleaning, ideally once or twice a year, is recommended to maintain the refrigerator’s efficiency.
As you progress through these steps, pay attention to any signs of wear or damage on the coils. If you notice significant issues, it may be advisable to seek professional assistance. With the condenser coils now clean and free from debris, you’re ready to move on to the next phase of maintenance – cleaning the evaporator coils.
Cleaning Evaporator Coils:
The cleaning process for evaporator coils is equally crucial for maintaining the efficiency of your refrigerator. Evaporator coils, often located inside the refrigerator compartments, play a pivotal role in ensuring proper cooling. Here’s a step-by-step guide to effectively clean your evaporator coils:

Identifying Evaporator Coil Location:
Locate the evaporator coils within the refrigerator. In some models, these coils may be hidden behind a cover or panel. Refer to your refrigerator’s manual for guidance on accessing the evaporator coils.
Accessing Evaporator Coils (if applicable):
If there is a cover or panel obstructing access to the evaporator coils, carefully remove it using the appropriate tools. Take note of any screws or fasteners, and keep track of their placement for reassembly.
Removing the Evaporator Coil Cover:
Once the cover is removed, expose the evaporator coils. Some refrigerators may have a drip tray beneath the coils, so be prepared to address any water accumulation.
Special Considerations for Some Models:
Certain refrigerator models may have specific considerations during the cleaning process. For instance, if your refrigerator has a frost-free feature, take extra care not to damage any components that facilitate this function.
Cleaning Evaporator Coils:
Use a coil brush to gently clean the evaporator coils, starting from the top and working your way down. Be cautious with the fins, as they can be delicate. In tight spaces, a compressed air canister can be useful for dislodging hidden debris.
Wiping Down with a Damp Cloth:
Dampen a cloth with water and carefully wipe down the coils to remove any remaining residue. Ensure that the coils are dry before reassembling the cover or panel.
Reassembling and Testing:
Reattach the cover or panel, securing it with screws or fasteners. Plug in the refrigerator and monitor its temperature to ensure that it’s cooling effectively. Restock the fridge once you confirm that it’s operating optimally.
Regular cleaning of evaporator coils, typically once a year or as needed, prevents the buildup of ice and ensures that the coils can efficiently absorb heat from the refrigerator’s compartments.
With the evaporator coils now clean and the refrigerator reassembled, you’ve completed a comprehensive maintenance routine. The following sections will guide you through reassembling the access panel or grille and provide tips on monitoring, restocking, and general maintenance to keep your refrigerator in top condition.
After completing the meticulous process of cleaning the condenser and evaporator coils, the reassembling and testing phase is crucial to ensure that your refrigerator resumes optimal functionality. Follow these steps to conclude the maintenance process effectively:
Reattaching the Access Panel or Grille:
If you removed an access panel or grille to access the coils, carefully reattach it. Use the appropriate tools to secure any screws or fasteners, ensuring a snug fit. This step is vital to protect the coils and other internal components.
Plugging in the Refrigerator:
Reconnect the refrigerator to the power source by plugging it back in. This marks the transition from maintenance mode to regular operation. Ensure that the power cord is securely inserted into the outlet.
Monitoring the Temperature:
Power on the refrigerator and monitor its temperature for a period to ensure that it’s cooling effectively. This allows you to identify any potential issues or irregularities in the cooling process.
Restocking the Fridge:
Once you’ve confirmed that the refrigerator is operating at the desired temperature, you can begin restocking it with the previously removed items. Organize the contents efficiently to facilitate proper air circulation and cooling.
By diligently following these steps, you not only complete the cleaning and maintenance process but also transition smoothly into the regular use of your refrigerator. Regular monitoring of the temperature in the hours following the cleaning is a precautionary measure to catch any anomalies early on.
As you restock the fridge, take note of any changes in its performance. If you observe persistent issues such as inadequate cooling or unusual noises, it may be prudent to seek professional assistance to address any underlying problems.
This meticulous reassembly and testing phase ensures that your refrigerator is back in action, operating efficiently, and ready to preserve your food items at the optimal temperature. The following sections will provide valuable maintenance tips to uphold the longevity and sustained efficiency of your refrigerator.
Maintenance Tips:
Beyond the immediate cleaning process, adopting a proactive approach to refrigerator maintenance can significantly contribute to its longevity and efficiency. Here are key maintenance tips to keep your appliance in optimal condition:

Regular Cleaning Schedule:
Establish a routine for cleaning the condenser and evaporator coils. Aim for at least once or twice a year, adjusting the frequency based on factors such as pet hair accumulation, environmental conditions, and overall usage.
Keeping the Surrounding Area Clean:
Maintain a clean and dust-free environment around the refrigerator. Regularly vacuum and dust the area to prevent debris from accumulating on the coils. Adequate ventilation enhances the appliance’s efficiency.
Checking Seals and Gaskets:
Periodically inspect the door seals and gaskets for any signs of wear, damage, or misalignment. Damaged seals can lead to energy wastage and compromise the fridge’s ability to maintain a consistent temperature.
Professional Maintenance Services:
Consider scheduling professional maintenance services. An experienced technician can inspect internal components, address potential issues, and perform tasks such as refrigerant checks, ensuring the overall health of your refrigerator.
Temperature Monitoring:
Regularly check and monitor the internal temperature of your refrigerator and freezer compartments. This helps you identify any deviations from the set temperatures, indicating potential issues with the cooling system.
Organizing Contents Efficiently:
Arrange the contents of your refrigerator in a way that allows for proper air circulation. Avoid overloading the shelves, as obstructed airflow can hinder the cooling efficiency of the appliance.
Avoiding Overcrowding:
While it’s essential to utilize the available space, avoid overcrowding the fridge. Overloaded shelves can impede the circulation of cool air, leading to uneven cooling and potential energy inefficiency.
Inspecting Water Dispenser and Ice Maker:
If your refrigerator features a water dispenser or ice maker, regularly inspect and clean these components. This helps maintain water quality and prevents potential issues such as clogs or leaks.
By incorporating these maintenance tips into your routine, you’ll not only prolong the lifespan of your refrigerator but also ensure that it operates at peak efficiency. A well-maintained refrigerator not only preserves your food items effectively but also contributes to energy savings and a reduced environmental impact.
Conclusion:
As we conclude this comprehensive guide on how to clean fridge coils and maintain your refrigerator, let’s recap the importance of this routine task and highlight the benefits of a diligent maintenance approach.
Recap of Importance:
- Cleaning the condenser and evaporator coils is vital for the efficient operation of your refrigerator. These coils play a critical role in the heat exchange process, which is essential for preserving the freshness of your food.
Benefits of Regular Cleaning:
- Energy Efficiency: Clean coils facilitate optimal heat exchange, reducing the workload on your refrigerator’s compressor and enhancing energy efficiency. This can lead to lower energy bills and a reduced environmental impact.
- Extended Appliance Lifespan: By preventing the accumulation of dust and debris on the coils, you contribute to the longevity of your refrigerator. Regular maintenance reduces wear on internal components, ensuring that your appliance serves you for years to come.
- Food Safety: Clean coils help maintain consistent temperatures within the refrigerator, safeguarding the quality and safety of your stored food items. A well-maintained refrigerator is less prone to temperature fluctuations that can affect food freshness.
Encouraging Energy Efficiency and Appliance Longevity:
- Adopting a proactive approach to refrigerator maintenance goes beyond the cleaning process. Regularly monitoring temperature, checking seals, and organizing contents efficiently are all integral to sustaining the efficiency and longevity of your appliance.
Final Words:
- Your refrigerator is a vital appliance that plays a central role in your daily life. By investing time and effort in regular cleaning and maintenance, you not only ensure its optimal performance but also contribute to energy conservation and reduce the need for premature replacements.
- Remember, the insights provided in this guide are tailored to empower you with the knowledge and skills necessary to care for your refrigerator. Whether you’re tackling the coils, checking seals, or organizing the contents, each step contributes to the overall health and functionality of your appliance.
- As you integrate these practices into your household routine, you’ll reap the rewards of a well-maintained refrigerator – one that not only keeps your food fresh but also operates efficiently and reliably. Here’s to a cool and efficient refrigerator, enhancing the quality of your kitchen and the longevity of your appliance investment.