
Contents
Introduction to Deck Sanding
Deck sanding is a fundamental aspect of deck maintenance and preservation, crucial for upholding the integrity, safety, and aesthetic appeal of outdoor living spaces. As an integral part of routine upkeep, deck sanding involves the meticulous removal of surface imperfections, weathered coatings, and rough patches from the wooden deck’s surface. This process not only revitalizes the deck’s appearance but also ensures its structural soundness, enhancing its longevity and resilience against outdoor elements.
At its core, deck sanding serves several essential purposes. First and foremost, it addresses wear and tear accumulated over time, including scratches, splinters, and uneven surfaces caused by exposure to sunlight, moisture, foot traffic, and other environmental factors. By eliminating these imperfections, deck sanding not only restores the deck’s smoothness but also minimizes the risk of splinters and trip hazards, thereby promoting a safer outdoor environment for homeowners and guests alike.
Moreover, the aesthetic benefits of deck sanding are undeniable. Over the years, decks can lose their original luster due to fading, staining, and general wear. By sanding away old finishes, dirt, and grime, homeowners can uncover the natural beauty of the wood grain, rejuvenating the deck’s appearance and creating an inviting outdoor retreat for relaxation, entertainment, and leisure activities.
Beyond aesthetics, deck sanding plays a pivotal role in preserving the structural integrity of the deck. By removing surface layers that may be compromised by moisture infiltration, rot, or insect damage, sanding helps to expose any underlying issues that require repair or replacement. By addressing these issues proactively, homeowners can prevent further deterioration and extend the lifespan of their decks, ultimately saving time, money, and effort on costly repairs or replacements in the long run.
In essence, deck sanding is not merely a cosmetic procedure but a proactive measure of maintenance and care that contributes to the overall health and longevity of outdoor living spaces. Through meticulous preparation, proper techniques, and diligent upkeep, homeowners can ensure that their decks remain not only functional and safe but also beautiful and inviting for years to come. In the following sections, we will delve deeper into the intricacies of the deck sanding process, exploring the tools, techniques, and best practices essential for achieving optimal results and preserving the beauty and integrity of outdoor decks.
Understanding the Deck Sanding Process
To embark on the journey of deck sanding effectively, it’s imperative to grasp the nuances of the process and the essential steps involved. Deck sanding is more than just smoothing out surfaces; it’s a systematic approach to restoring and revitalizing outdoor spaces, ensuring they withstand the test of time and weather conditions.
Assessing the Deck
The first step in the deck sanding process is a thorough assessment of the deck’s current condition. This involves a keen eye for detail to identify any signs of wear, damage, or deterioration. Look for areas where the wood may be splintered, cracked, or uneven, as well as any protruding nails or screws that could pose safety hazards. By conducting a comprehensive assessment, homeowners can pinpoint areas that require special attention during the sanding process, enabling them to plan and prioritize tasks accordingly.
Gathering Tools and Materials
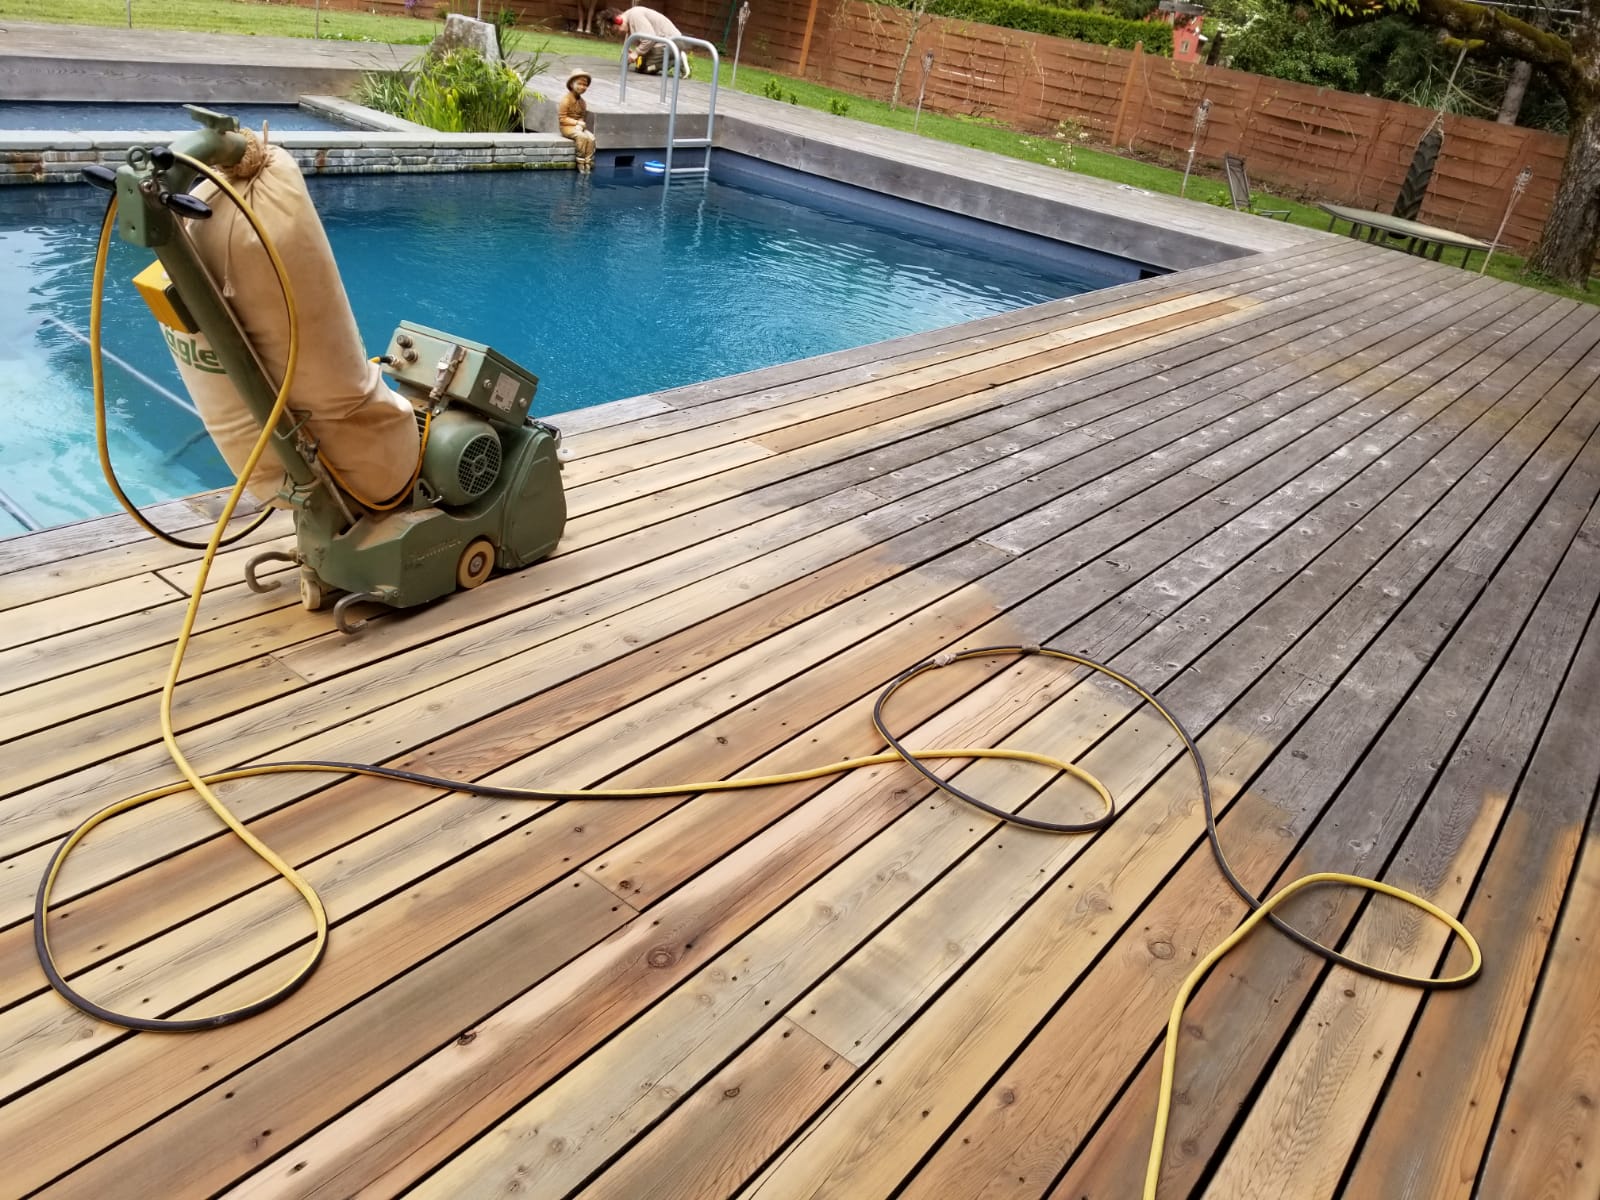
Equipping oneself with the right tools and materials is essential for a successful deck sanding endeavor. Depending on the size and condition of the deck, various tools may be needed, including sandpaper of different grits, power sanders such as orbital or belt sanders, and hand sanding tools for intricate or hard-to-reach areas. Additionally, safety equipment such as goggles, gloves, masks, and ear protection should be worn to shield against dust, debris, and potential hazards. Furthermore, having cleaning supplies such as brooms, vacuums, and deck cleaners on hand ensures a clean and orderly work environment, facilitating the sanding process and promoting optimal results.
By meticulously assessing the deck and gathering the necessary tools and materials, homeowners lay the groundwork for a smooth and successful deck sanding project. With a clear understanding of the deck’s condition and the resources at their disposal, they can proceed with confidence, knowing they are well-equipped to tackle the task at hand. In the subsequent sections, we will delve deeper into the preparatory steps and techniques essential for achieving professional-grade results and breathing new life into outdoor decks.
Preparing the Deck for Sanding
Before diving into the sanding process, proper preparation of the deck surface is paramount to ensure optimal results and streamline the overall workflow. This preparatory phase involves a series of meticulous steps aimed at clearing the deck of obstacles, addressing any existing damage, and creating a conducive environment for sanding.
Clearing the Deck
The initial step in preparing the deck for sanding is to clear the space of any obstructions that may hinder the sanding process or pose safety risks. This includes removing furniture, potted plants, and any other decorative elements from the deck surface. By clearing the deck of clutter, homeowners not only create ample workspace but also minimize the risk of damage to surrounding objects during the sanding process.
Once the deck is free of obstructions, the next step is to eliminate surface debris and loose particles that may impede the sanding process. Using a broom or vacuum, thoroughly sweep or vacuum the deck surface to remove dirt, leaves, and other debris. Pay close attention to cracks, crevices, and corners where debris may accumulate, ensuring a clean and debris-free surface for sanding.
Repairing Damaged Areas
With the deck cleared and debris removed, the next step is to address any existing damage or imperfections on the deck surface. This may involve hammering down protruding nails or screws, replacing rotten or damaged boards, and filling cracks or holes with wood filler. By addressing these issues proactively, homeowners can prevent further deterioration and ensure a smooth and uniform surface for sanding.
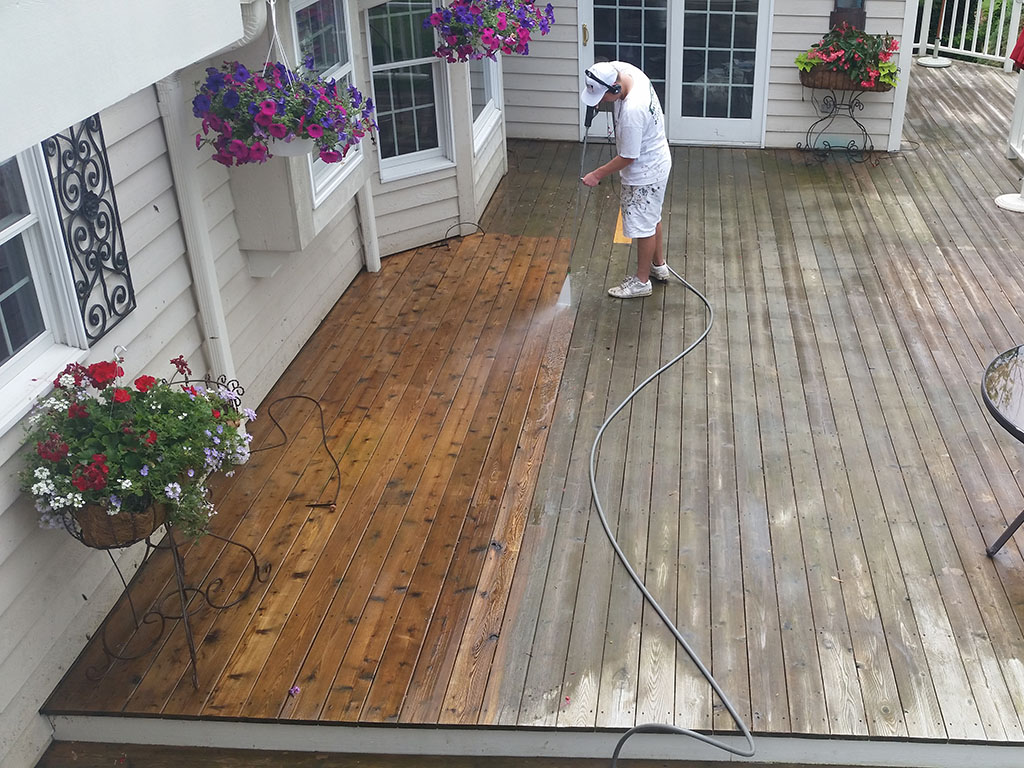
In addition to structural repairs, it’s also essential to consider the condition of the deck’s finish and coatings. If the existing finish is peeling, flaking, or otherwise compromised, it may need to be removed before sanding can commence. This can be achieved using a paint scraper or chemical stripper, depending on the type of finish and the extent of damage.
By meticulously preparing the deck surface through clearing, debris removal, and repair, homeowners lay the foundation for a successful sanding project. With a clean and structurally sound surface, they can proceed with confidence, knowing that they have addressed any underlying issues and created an ideal canvas for the sanding process. In the subsequent sections, we will explore the various sanding techniques and tips necessary for achieving professional-grade results and rejuvenating outdoor decks.
Sanding Techniques and Tips
Achieving a smooth and uniform finish during the sanding process requires careful attention to detail, proper technique, and the selection of appropriate tools and materials. From choosing the right sandpaper grit to mastering sanding patterns, homeowners can employ a variety of techniques and tips to optimize their results and breathe new life into their outdoor decks.
Choosing the Right Sandpaper Grit
One of the fundamental aspects of successful deck sanding is selecting the appropriate sandpaper grit for the task at hand. Sandpaper is available in various grits, ranging from coarse to fine, with each grit serving a specific purpose. Coarse grits, such as 40 or 60 grit, are ideal for removing stubborn stains, paint, or old finishes, while medium grits, such as 80 or 100 grit, are suitable for general sanding and smoothing rough surfaces. Fine grits, such as 120 or 150 grit, are used for final finishing and achieving a smooth, polished surface. By matching the grit to the condition of the deck and the desired level of refinement, homeowners can ensure optimal results and minimize unnecessary sanding.
Selecting the Appropriate Sanding Tool
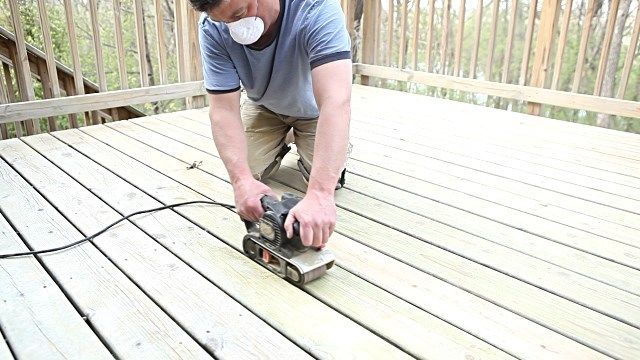
In addition to sandpaper, the selection of the appropriate sanding tool is crucial for achieving professional-grade results. Power sanders, such as orbital sanders, belt sanders, and detail sanders, offer efficiency and precision, making them ideal for larger surface areas and intricate details. Hand sanding tools, such as sanding blocks or sanding sponges, provide greater control and flexibility for reaching tight corners and contours. By choosing the right sanding tool for the job, homeowners can maximize productivity and achieve consistent results across the entire deck surface.
Sanding Patterns and Directions
When sanding the deck surface, it’s essential to follow proper sanding patterns and directions to ensure uniformity and consistency. Avoid sanding against the grain of the wood, as this can result in unsightly scratches and uneven surfaces. Instead, sand with the grain, moving in smooth, overlapping strokes to achieve a uniform finish. Be mindful of maintaining consistent pressure and speed throughout the sanding process, taking care not to linger in one area for too long, which can result in over-sanding and unevenness.
Managing Dust and Debris
Sanding inevitably generates a significant amount of dust and debris, which can not only create a messy work environment but also pose health hazards if inhaled. To minimize dust and debris, consider using sanders equipped with dust collection systems or attachable vacuum hoses. Additionally, regularly clean the work area with a broom or vacuum to remove accumulated dust and debris, ensuring a clean and orderly workspace throughout the sanding process.
Taking Breaks and Evaluating Progress
Sanding can be a physically demanding task, requiring concentration and precision for extended periods. To prevent fatigue and maintain focus, be sure to take regular breaks and stay hydrated throughout the sanding process. Use these breaks to evaluate progress, inspecting the deck surface for missed spots or uneven sanding. By taking breaks and periodically assessing progress, homeowners can ensure thoroughness and accuracy, ultimately achieving professional-grade results and revitalizing their outdoor decks.
By employing these sanding techniques and tips, homeowners can navigate the sanding process with confidence and achieve optimal results. From choosing the right sandpaper grit to mastering sanding patterns and managing dust, attention to detail and proper technique are essential for breathing new life into outdoor decks and creating inviting outdoor spaces for relaxation and entertainment. In the subsequent sections, we will explore post-sanding cleanup and maintenance, as well as the importance of ongoing deck care for long-term durability and enjoyment.
Post-Sanding Cleanup and Maintenance
Once the deck sanding process is complete, attention turns to post-sanding cleanup and maintenance to ensure the newly revitalized surface remains pristine and protected against the elements. This phase involves removing sanding residue, inspecting the deck for any overlooked imperfections, and applying sealant or stain to enhance durability and aesthetics.

Removing Sanding Residue
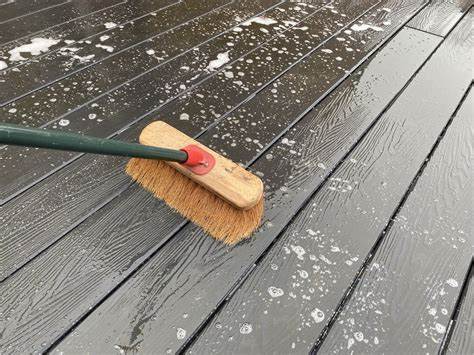
After sanding, the deck surface may be littered with sanding residue, including dust, wood particles, and debris. To achieve a clean and polished finish, it’s essential to remove this residue thoroughly. Using a vacuum or broom, carefully sweep or vacuum the deck surface to eliminate excess dust and debris. Pay particular attention to corners, crevices, and other hard-to-reach areas where residue may accumulate. Additionally, consider wiping down the deck surface with a damp cloth to remove any remaining particles, ensuring a smooth and debris-free finish.
Inspecting the Deck
With the sanding residue removed, the next step is to inspect the deck surface for any overlooked imperfections or rough spots. Take the time to carefully assess the entire deck, paying close attention to areas that may require additional sanding or touch-up work. Look for uneven surfaces, rough edges, or lingering splinters that may detract from the overall finish. By identifying and addressing these issues promptly, homeowners can ensure a flawless and uniform result that enhances the deck’s appearance and longevity.
Applying Sealant or Stain
Once the deck surface is clean and free of imperfections, the final step is to apply a protective sealant or stain to enhance durability and aesthetics. Sealants and stains provide an additional layer of protection against moisture, UV rays, and general wear and tear, helping to prolong the lifespan of the deck and preserve its natural beauty. Before applying sealant or stain, ensure the deck surface is completely dry and free of dust and debris. Use a brush, roller, or sprayer to apply the sealant or stain evenly, working in small sections to ensure thorough coverage. Allow the sealant or stain to dry completely according to the manufacturer’s instructions before allowing foot traffic or placing furniture and other objects on the deck surface.
Maintaining the Deck
With the deck sanded, cleaned, and sealed, ongoing maintenance is key to preserving its newly revitalized appearance and structural integrity. Regular inspections for signs of wear, damage, or deterioration are essential for identifying potential issues early and addressing them promptly. Keep an eye out for loose boards, protruding nails, or signs of water damage, and take proactive measures to address these issues as they arise. Additionally, consider scheduling periodic re-sanding and resealing as needed to maintain optimal protection and appearance.
By adhering to post-sanding cleanup and maintenance practices, homeowners can ensure that their decks remain in top condition for years to come. From removing sanding residue to applying protective sealant and stain, attention to detail and regular upkeep are essential for preserving the beauty and longevity of outdoor decks. In the following sections, we will explore the importance of deck maintenance and offer practical tips for ensuring long-term durability and enjoyment.
Conclusion
In conclusion, the process of sanding a deck is not merely a task of surface refinement but a crucial component of deck maintenance and preservation. By understanding the intricacies of deck sanding and adhering to proper techniques and best practices, homeowners can breathe new life into their outdoor living spaces, enhancing both aesthetics and functionality.
Throughout the sanding process, from assessment and preparation to post-sanding cleanup and maintenance, attention to detail and diligence are paramount. By assessing the deck’s condition, gathering the necessary tools and materials, and preparing the deck surface meticulously, homeowners set the stage for a successful sanding project. Through careful selection of sandpaper grits, proper sanding techniques, and effective dust management, they can achieve professional-grade results and create a smooth and uniform finish that revitalizes the deck’s appearance and promotes safety.
Furthermore, post-sanding cleanup and maintenance play a crucial role in preserving the newly revitalized deck surface and ensuring its long-term durability. By removing sanding residue, inspecting the deck for imperfections, and applying protective sealant or stain, homeowners can safeguard their investment and enjoy their outdoor decks for years to come. Additionally, ongoing maintenance and regular inspections are essential for identifying potential issues early and addressing them promptly, thus prolonging the lifespan of the deck and maintaining its pristine condition.
In essence, deck sanding is not just a chore but a labor of love—a commitment to preserving outdoor spaces and creating inviting environments for relaxation, entertainment, and leisure. By embracing the sanding process and investing time and effort in proper maintenance, homeowners can enjoy the beauty and functionality of their decks season after season, ensuring countless moments of joy and cherished memories with family and friends.
As we conclude this exploration of deck sanding, let us reaffirm the importance of proactive maintenance and care in safeguarding outdoor living spaces and preserving their natural beauty. By incorporating the principles and practices outlined in this guide, homeowners can embark on their deck sanding journey with confidence, knowing they have the knowledge and tools to achieve optimal results and create outdoor sanctuaries that inspire and delight for years to come.